4e. Multiple Reference Timeline
Use the multiple reference timeline feature to let different classes access the same questions according to their specific schedules.
-
Enable the Multiple Reference Timeline feature.
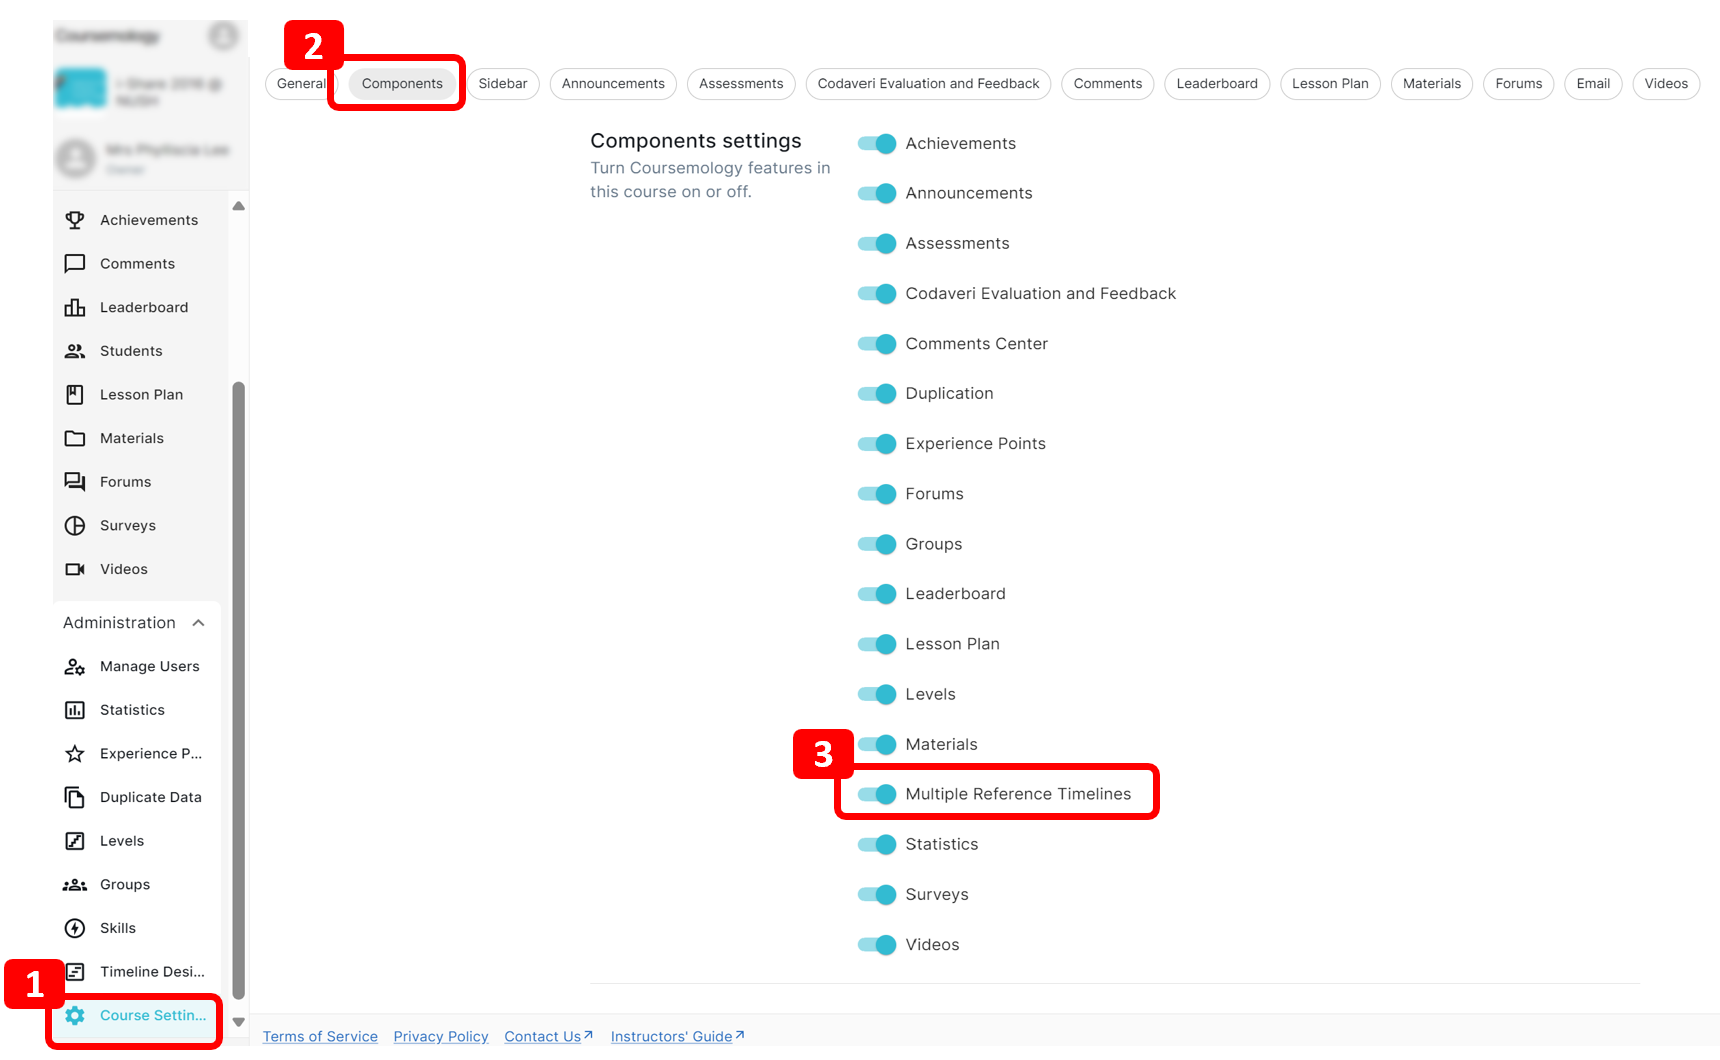
If you don’t see the Multiple Reference Timeline on your Components page, it means the feature isn’t enabled. Contact your instance admin to enable it.
-
Create a new timeline for each class.
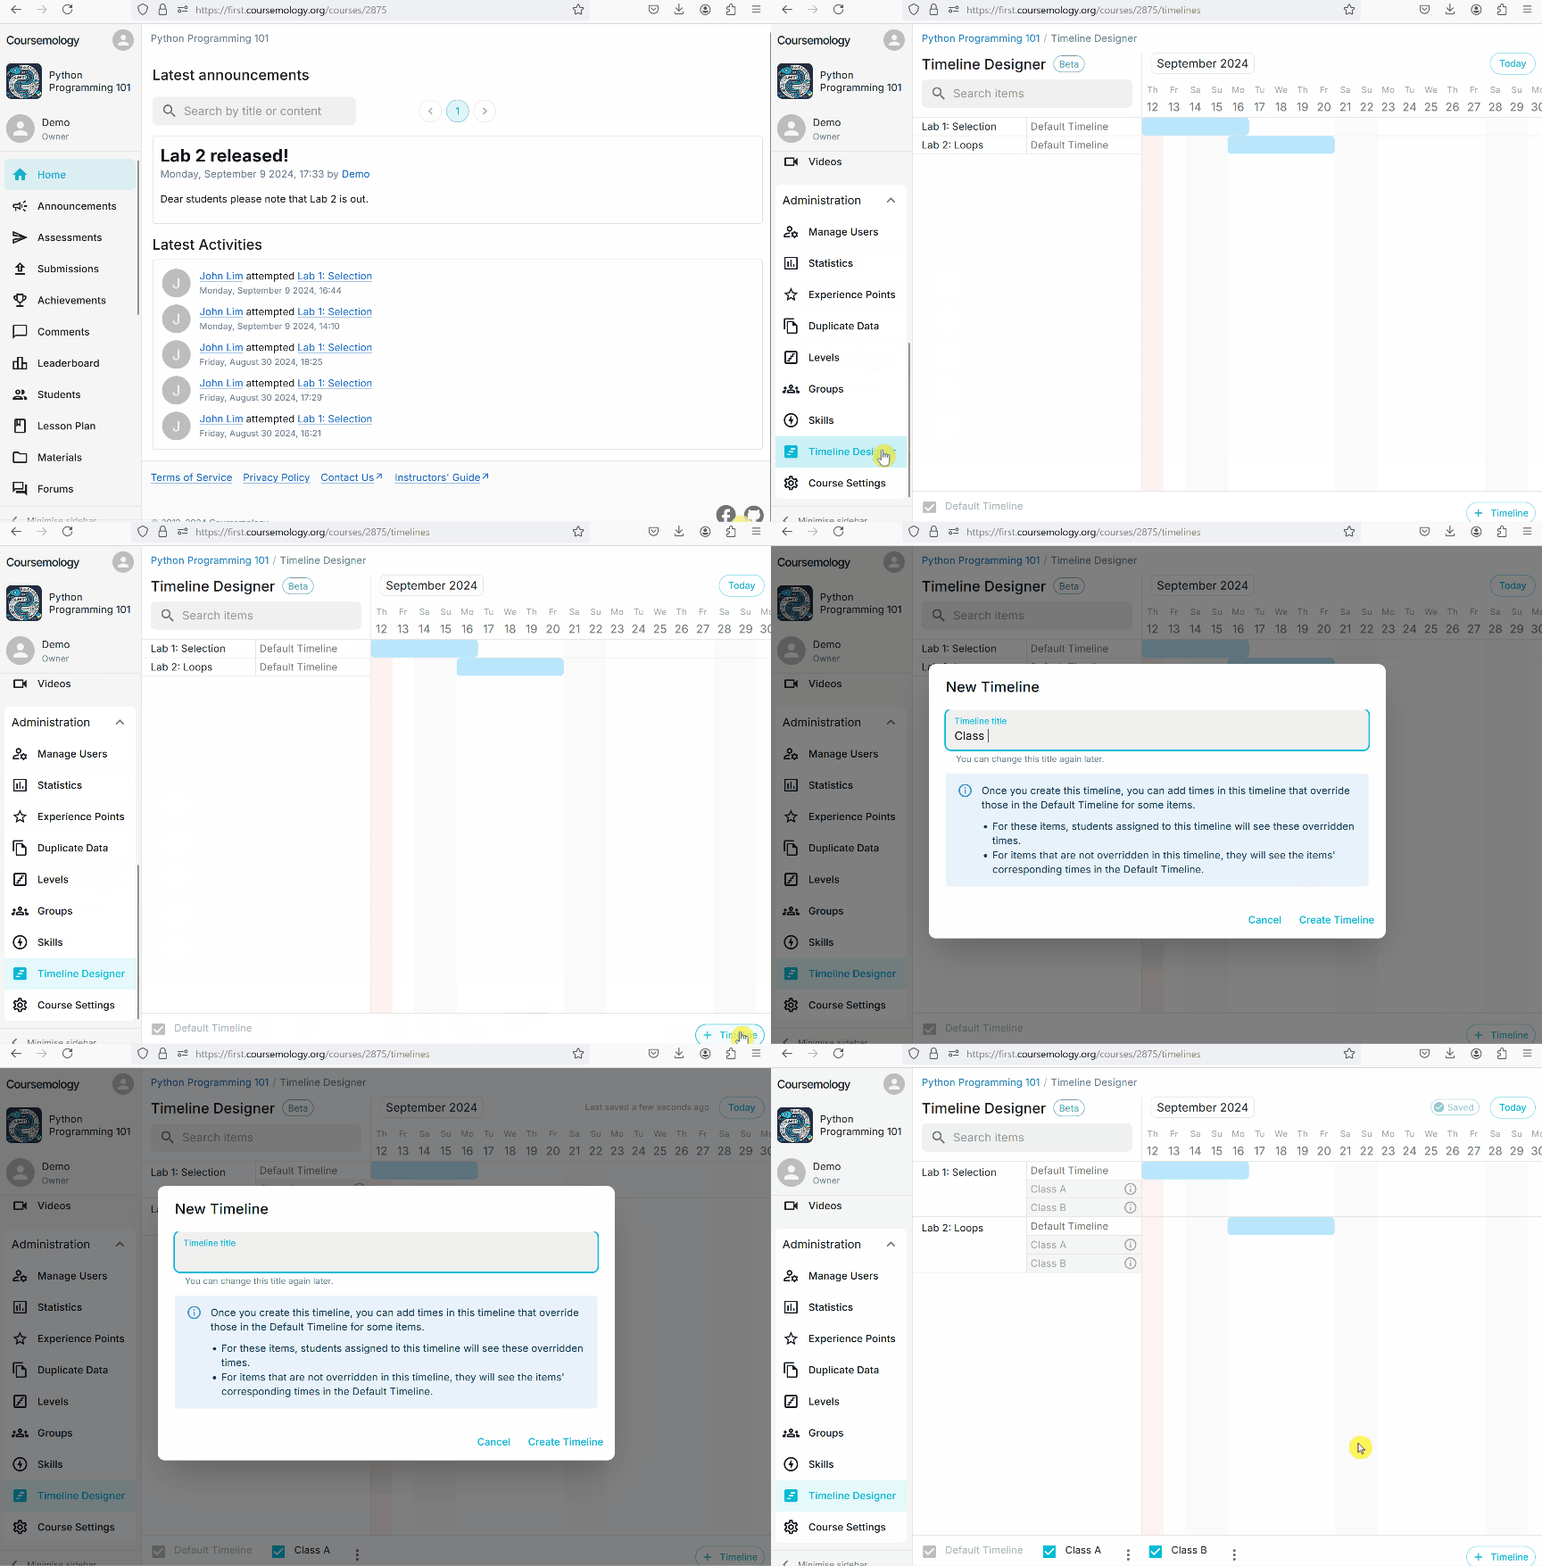
-
The Default Timeline will follow the settings on the main assessment page.
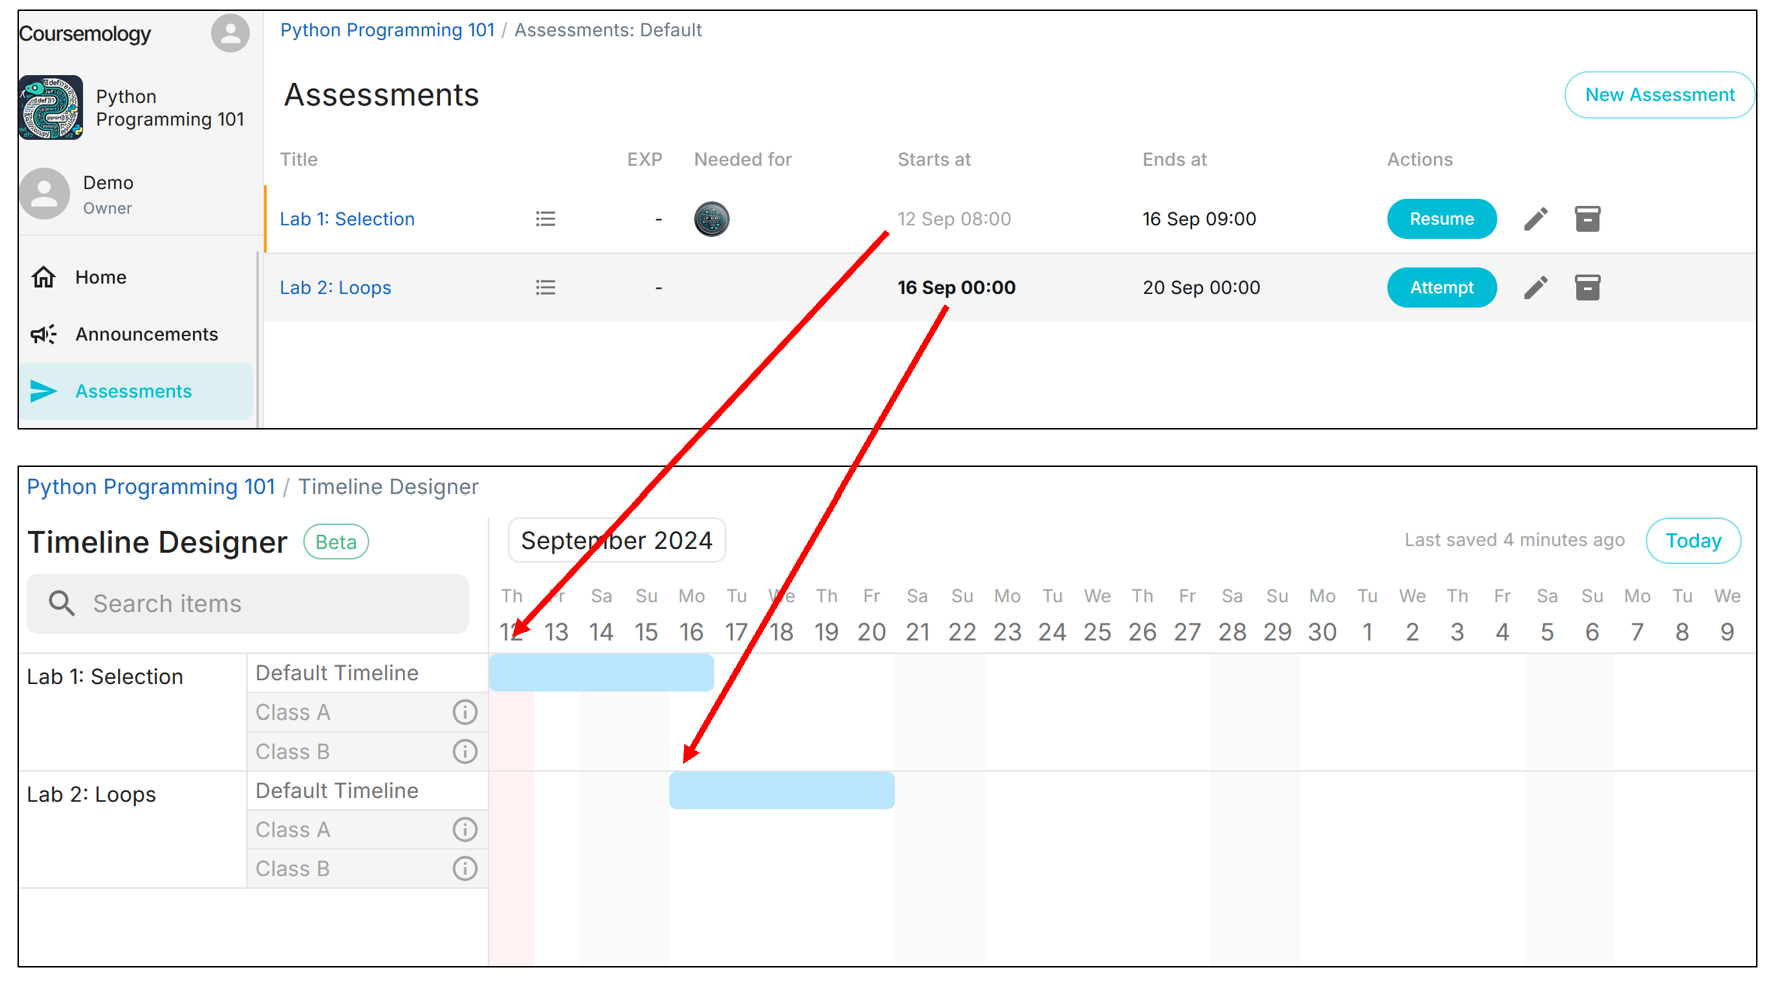
-
If a class needs to deviate from the default timeline setting, click on the date of the assessment release to set a new timeline.
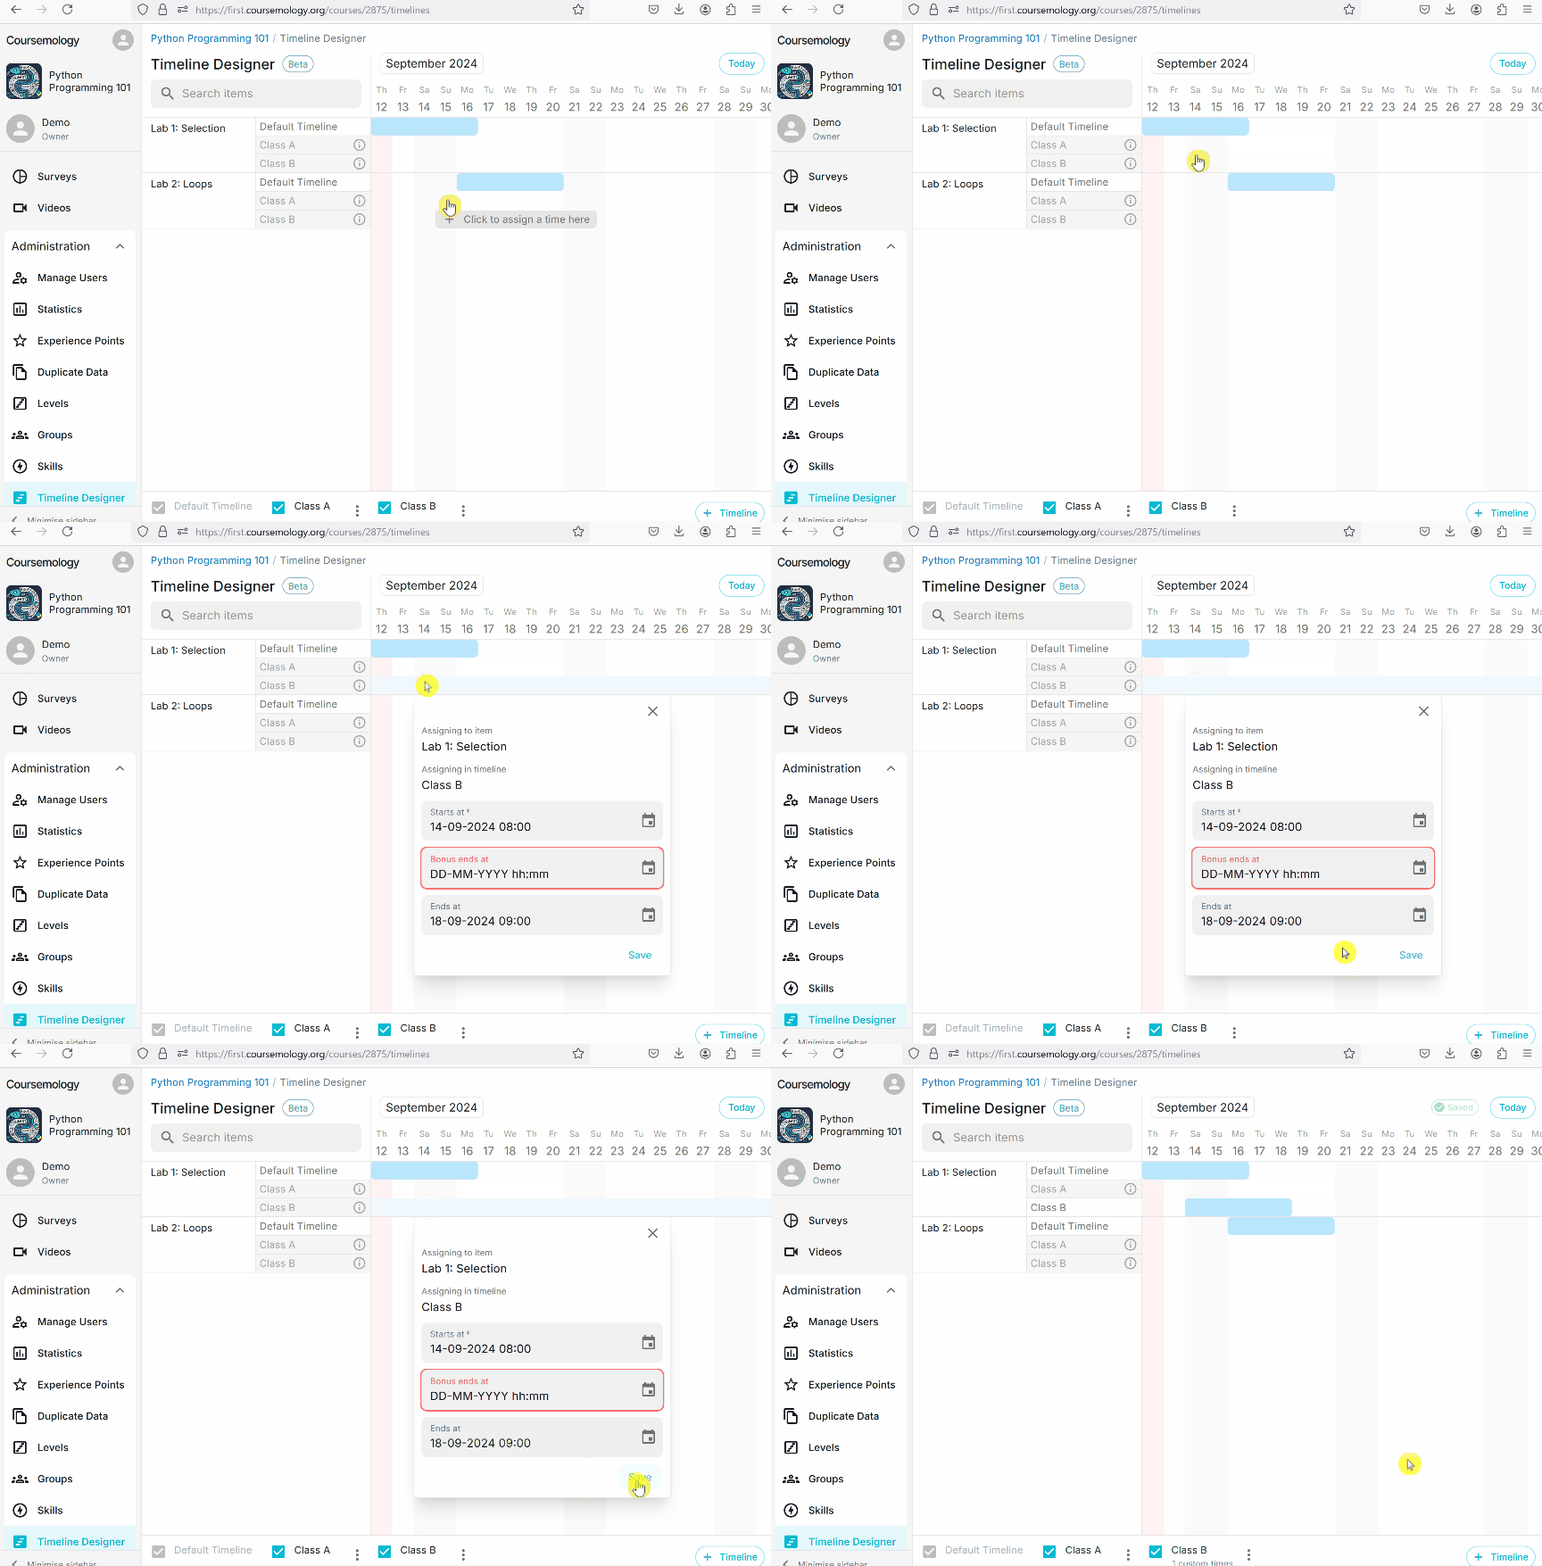
In this example, Class A will follow default timeline (i.e. 12th Sep), while Class B will have its own timeline (i.e. 14 Sep) for Lab 1.
-
Finally, assign relevant students to desired timeline. You may do this under Manage Users page.
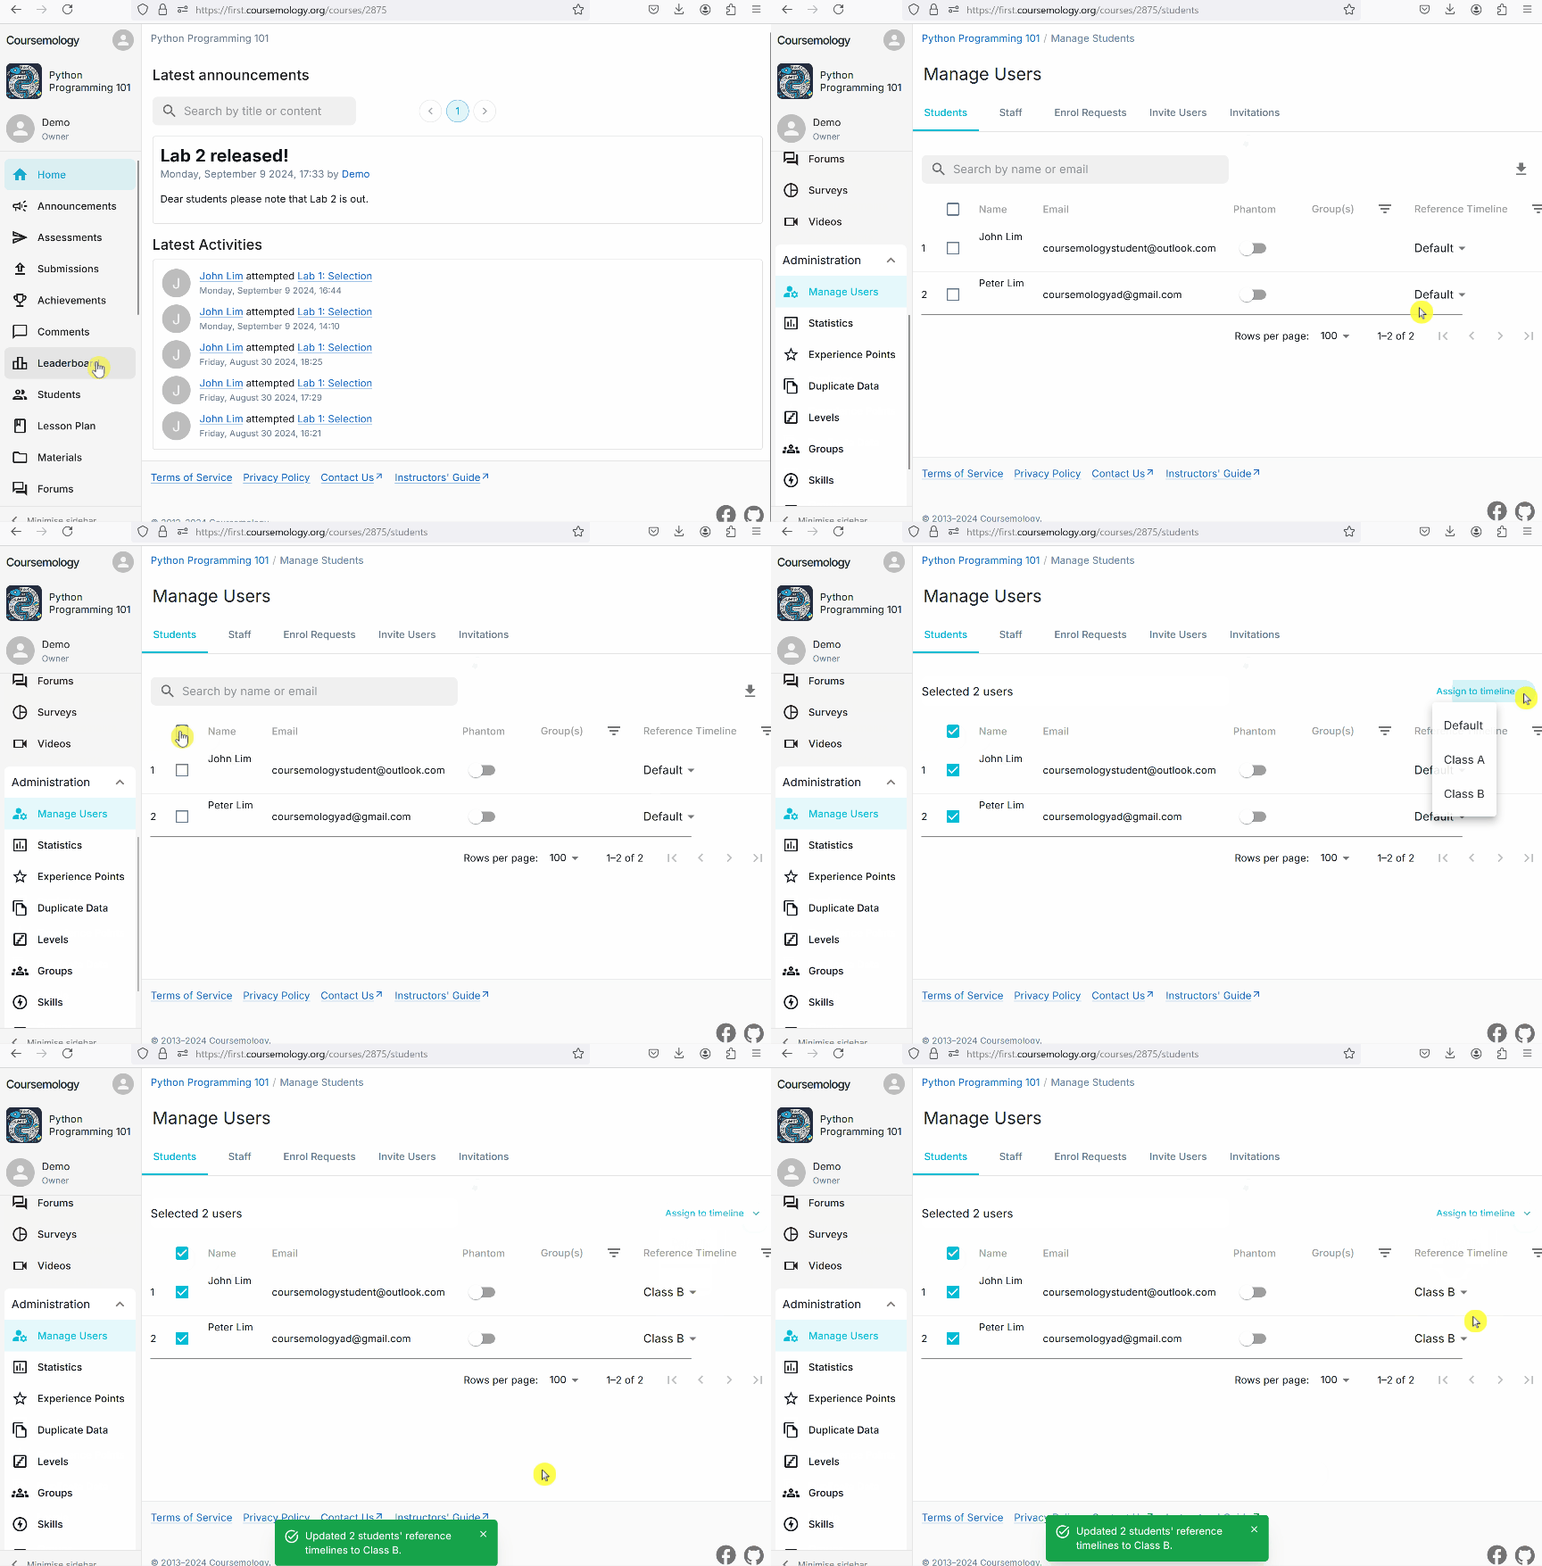
Assigned classes will see the assessment only according to their assigned timeline. If you edit the questions in the assessment, you only need to do it once!